
This Airfix 1/72 Sea Harrier was a whim purchase and build inspired by the recent 40th anniversary of the Falkland Islands War.
This brief conflict has bobbed in and out of my consciousness since it took place in 1982. As a news- and history-junky teenager, I paid very close attention to the conflict on TV and in the newspapers as it unfolded in real time. A few years later, I listened to Falklands stories told by Royal Army artillery spotters while waiting in a tank trail traffic jam at the Grafenwöhr training range in Germany. A decade or so after the UK took back the islands, I was studying Falkland Islands War analyses and battle diaries as part of my intelligence analyst training.
It all came back to me last year with the launch of the Battleground: Falkland Islands War podcast, which used the 40th anniversary to revisit the war over 18 informative episodes. (The Battleground team has since moved on to coverage of the Ukraine war; the first 18 episodes of Battleground cover the Falkland Islands War) The Battleground podcast provides a well-paced and informed retrospective on the conflict, and debunks the simplistic view that British victory over Argentina was an all but inevitable outcome. Those Royal Army artillery guys at Graf hinted that their units had suffered were some embarrassing moments, and my studies painted a picture of a closely run, pitched campaign. Indeed, the Royal Navy, Army, and Air Force that deployed nine years later to Desert Storm in 1991 was arguably much improved—in large measure as a result of hard lessons learned in the South Atlantic.
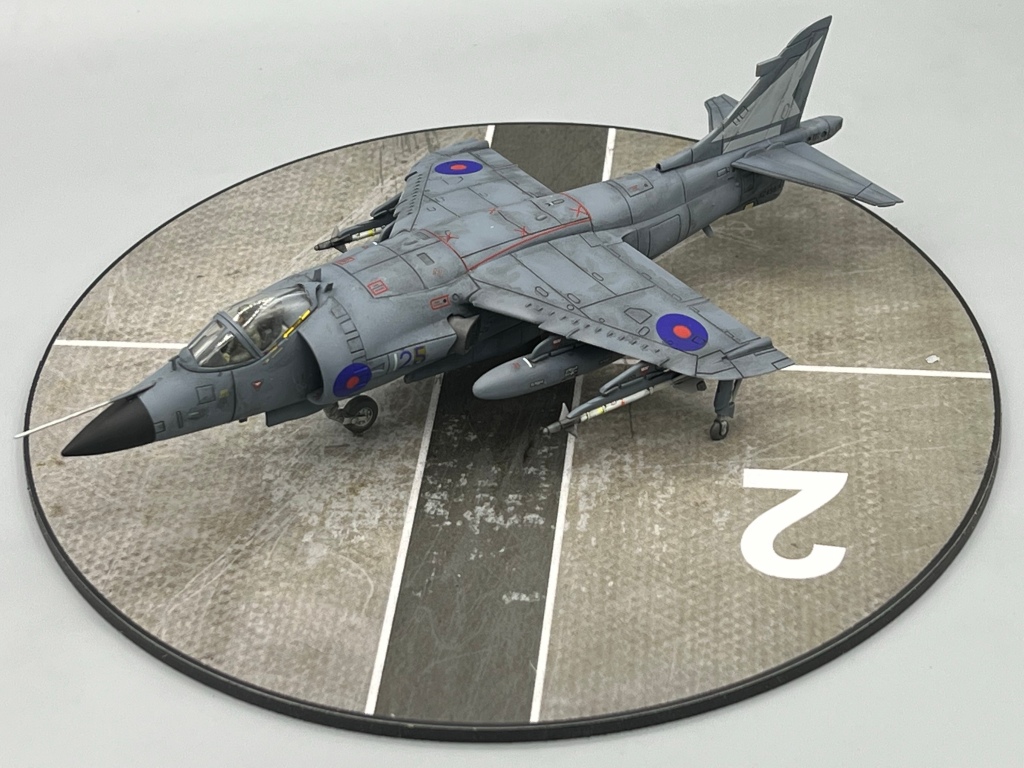
Airfix, for its part, did not miss a beat, releasing several Falkland Islands War 40th anniversary kits. High on the fumes of the Battleground podcast, I could not resist Airfix’s 1/72 FRS.1 Sea Harrier kit when it came my way. Between the box art and the look of the parts on their sprues, I was sucked into the kit right away.
The tooling for this Sea Harrier dates back a decade or so, and is nonetheless eminently serviceable. Subtle it ain’t: panel lines are deep, sprue gates quite stout, and locating pins and holes are sturdy. But the lines are all there, and fit is generally excellent. I also found that the combination of Airfix’s particularly soft-ish styrene (I hesitate to merely call it ‘soft’—there are other attributes evident here as well, such as not forming fibers or crumbs. Paging engineer Mike Baskette at Plastic Model Mojo…) and fat sprue gates were particularly easy to sand or file away, with no stubborn humps, pitting, or discoloration.
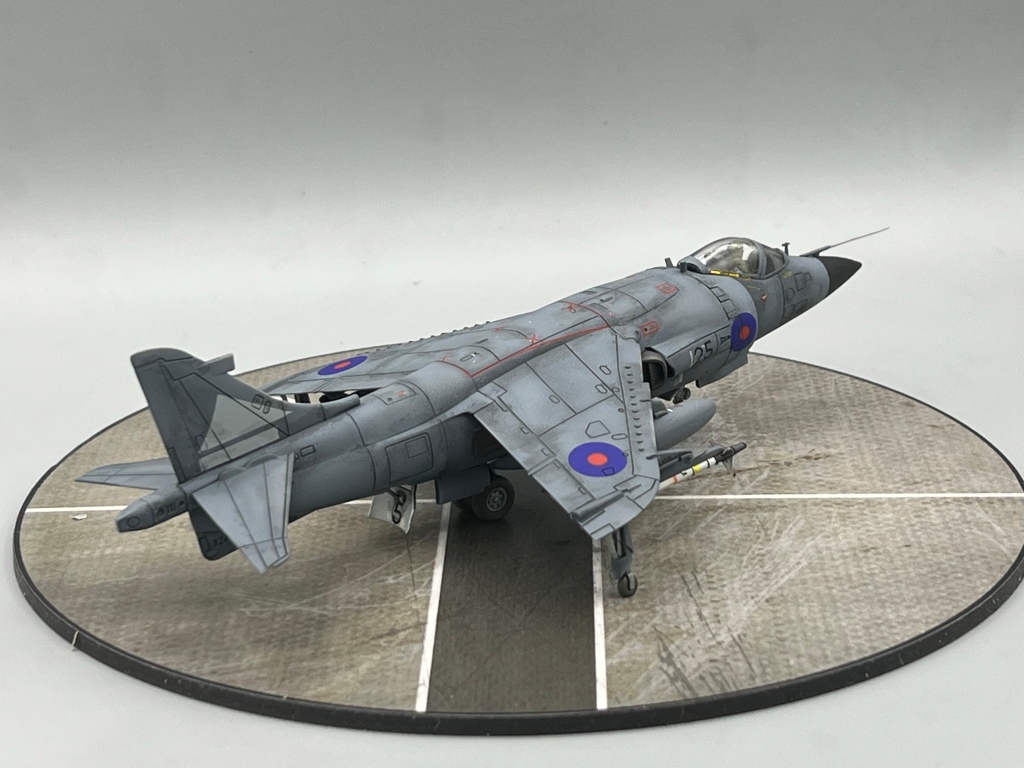
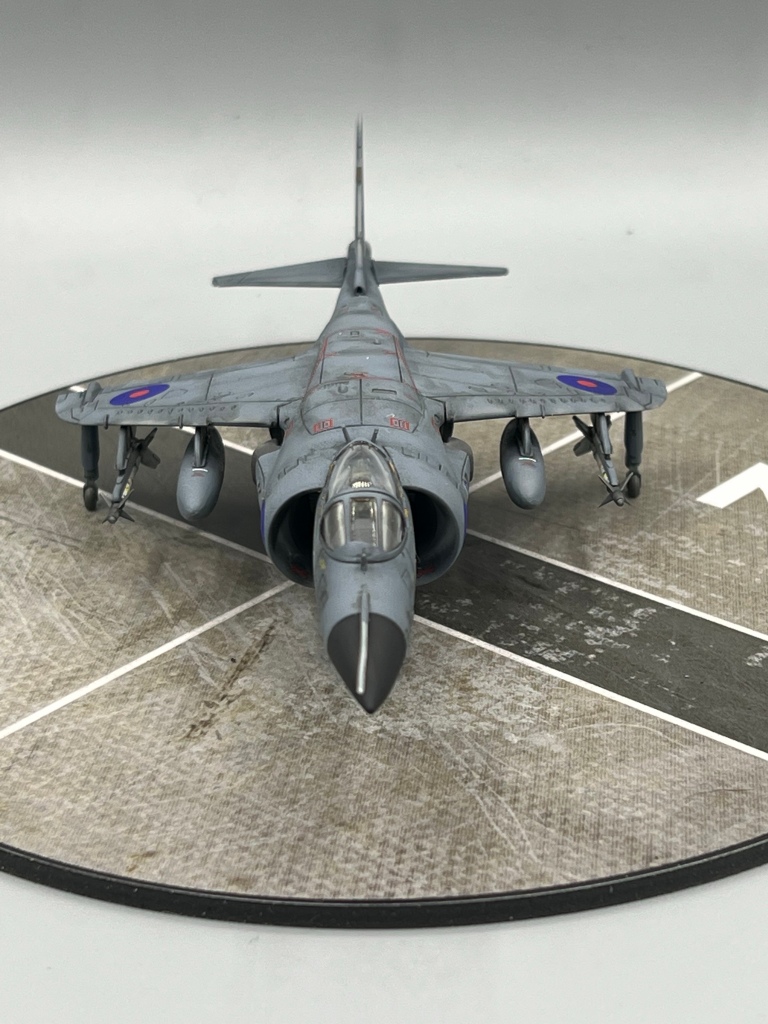
In the midst of assembling the Sea Harrier, the Just Making Conversation podcast visited the Airfix factory, which occasioned discussion of Airfix’s particular design and engineering touches. I learned that Airfix values and prioritizes its casual and entry level customers, and Airfix wants kids and beginners to have affirming, positive experiences with their kits. And that philosophy explains much about how my Airfix Sea Harris went together. It is engineered to fit well, with as many joints as possible concealed in actual panel lines and minimal exposed, plain joints requiring filling. The wings were molded with the fuselage spine so as to impart the correct dihedral—a signature of the Harrier ‘look’.
And those deep panel lines: they’re virtually impossible to fill with overzealous paint coats. Some 10- or 12-year old who builds this kit is going to end up with a sturdy, correctly configured model that looks like a Sea Harrier, and may even be able to try some fancy techniques on the panel lines
In short, construction of the Airfix Sea Harrier was a joy. Unfortunately, the instructions had some critical omissions, and the Scalemates web site saved the day—I was able to find instructions from an earlier release of the kit that contained the missing steps.
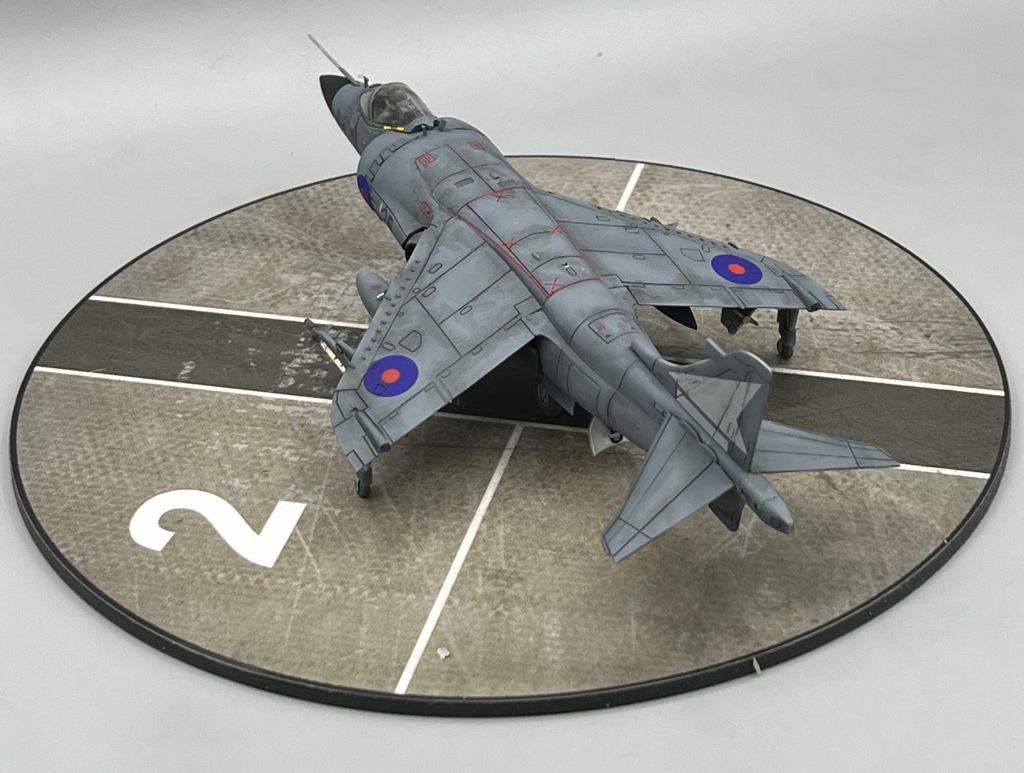
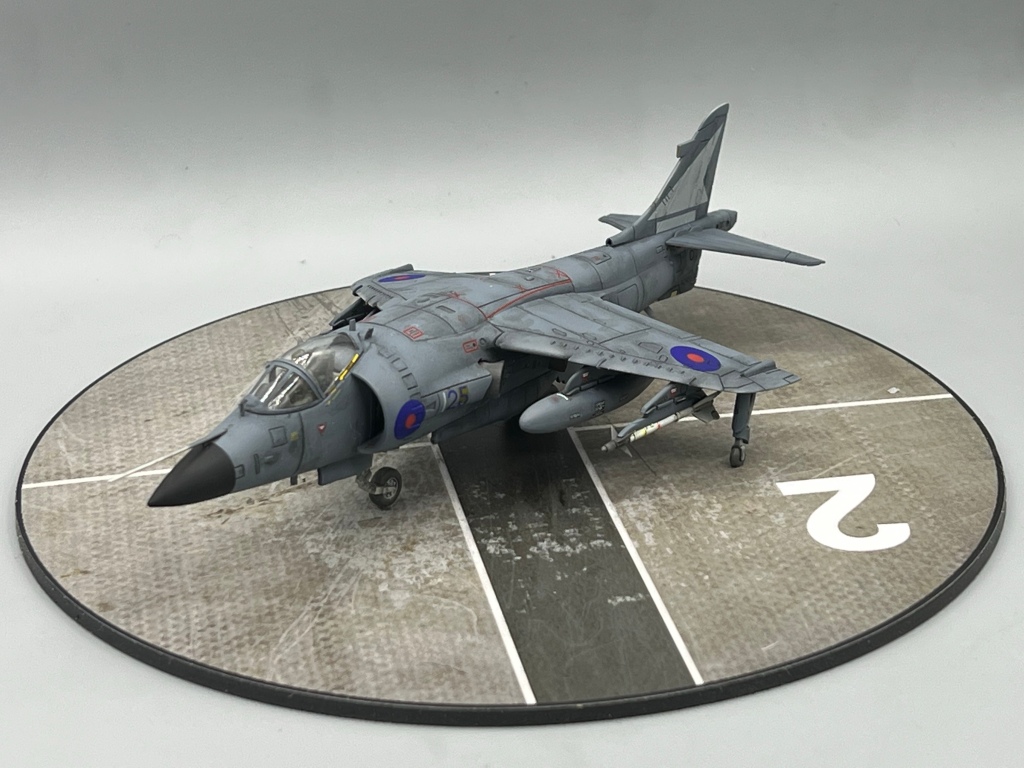
The joy continued with the gratifyingly simple dark gray paint scheme. After a dip in Future, the canopy was masked with an Eduard mask set. Light gray Mr. Surfacer primer went on first. After the primer dried, I outlined the panels and edges with AK Real Black. The main fuselage color is AK Real Extra Dark Sea Gray. I painted all the details according to Airfix’s color callouts. A further criticism of Airfix’s instructions (and other kit manufacturers) is that color callouts are expressed as numbers instead of actual color names. Once painting was done, the Sea Harrier got a coat of Alclad Aquagloss in preparation for decals and weathering.
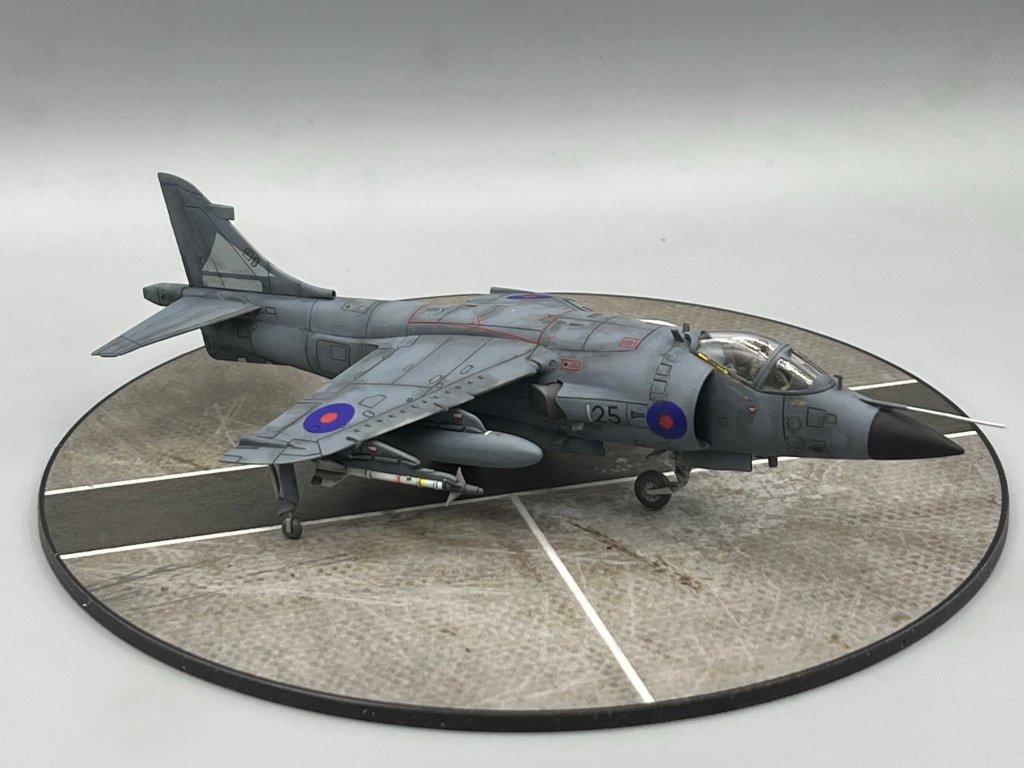
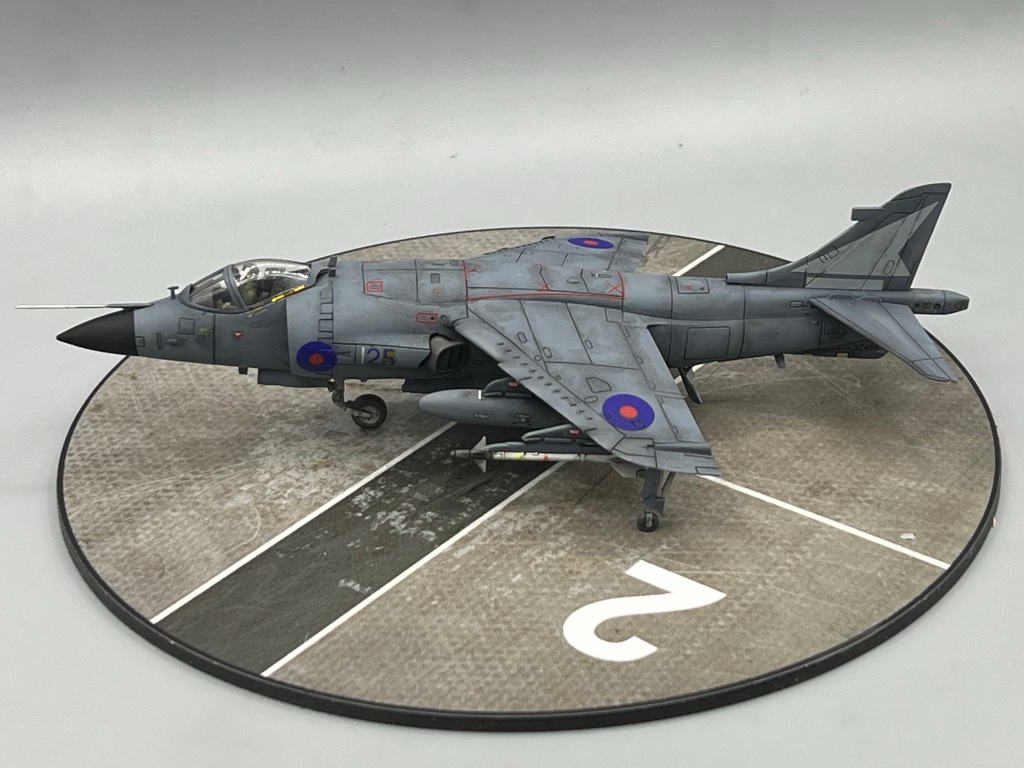
Airfix’s decals are sturdy and very well printed. They responded well to GSI Creos Mr. Setter and Mr. Softer. I chose markings for the dark gray Hermes Air Group. One place where the rigid decals did not go down well were on the Sidewinder missiles, where the decals are expected to wrap all the way around the missile tube. None of mine did, but I did use a paint marker to carefully ring each Sidewinder with yellow and red stripes.
After another coat of Alclad Aquagloss, I used a new (to me) tool to apply panel liner: a fine nib pen. Another new tool, a kind of blotter or tubular eraser on a stick, quickly cleaned up excess panel liner. I tried these new tools and techniques on the undersides of the wings and tail first. Once I got the hang of it (didn’t take long), I moved on to the fuselage and top wing surfaces.
A final step was mounting the Sea Harrier to a Coastal Kits Royal Navy modern carrier base. I used dabs of clear silicone seal on the pre-flattened wheels to fix the model to the base.
All in all, the Airfix FRS.1 kit scratched my Falkland Islands War itch, and was a satisfying build, thanks to the builder-friendly engineering and the excellent decals. Had I not been interrupted by real life and the holidays, it would have taken me no more than a couple of weeks of evenings to get ‘er done. Perhaps another 1/72 jet kit might strike my fancy sometime soon.

I have Tamiya 1/48 scale Sea Harrier probably bought in the 1990s. Quite inspirational post.
LikeLike
Make that two… I also have Monogram 1/48 scale Hawker Harrier bought in the 1980s.
LikeLike
Beautiful build, Steve! The base looks great and adds a lot to the presentation.
LikeLike
A lovely Sea Harrier! Well done.
LikeLiked by 1 person